#SmartLogistics
4 February 2026
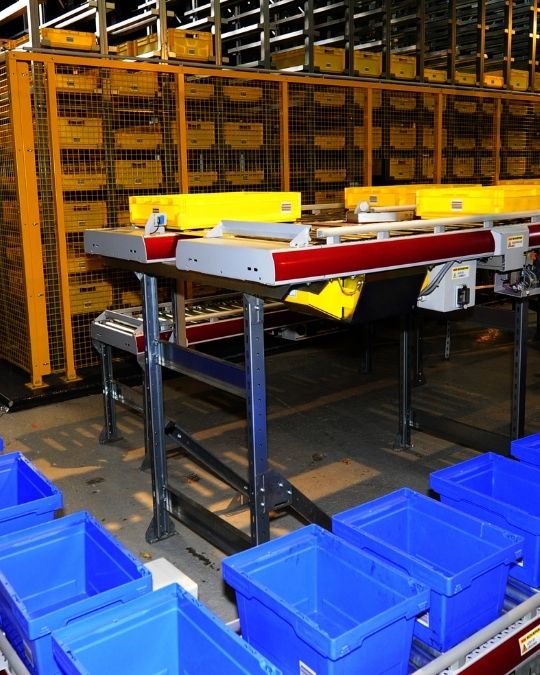
Deploying a pick-to-light project : the step-by-step guide
Deciding to deploy a pick-to-light system is one thing.
Knowing where to start, how to structure the project, which pitfalls to avoid and how to measure results is quite another.
This guide is aimed at those who have moved past the conviction stage and are now ready to act : logistics managers, technical directors, project managers.
Step 1 : Frame the need before talking technology
Start from the problem, not the solution
The first mistake in a pick-to-light project is starting with the choice of hardware.
Before comparing light indicators, you need to answer a few fundamental questions : which picking zones are most critical ? Where do picking errors concentrate? What are the bottlenecks slowing throughput ?
These answers determine not only the project scope, but also the most appropriate technical architecture.
Define measurable success criteria upfront
A project without success indicators defined from the outset is a project without a steering mechanism.
Before starting, set concrete targets : error rate goal, target picking time, order lines processed per hour.
These same indicators will be used to measure ROI once deployment is complete, and to adjust if results fall short.
Assess the field environment
The physical constraints of the warehouse or production line need to be evaluated at this stage : racking height, lighting conditions, ambient noise level, frequency of zone reorganisation, available network infrastructure.
These parameters directly influence the choice between a wired or wireless solution, and in the vast majority of cases, they make a strong argument for wireless.
Our article Wireless Pick-to-Light : the end of the barrier to adoption ? explains why in detail.
Step 2 : Cost the project and validate the ROI
Build a solid business case
This is often the step that determines the final decision, particularly when the project needs sign-off from senior management or an investment committee.
The business case must include the total project cost (hardware, installation, WMS integration, training) and set it against the expected gains : reduced picking time, lower error rate, savings on maintenance and future reorganizations.
Our article Pick-to-light: how to calculate its ROI offers a detailed method with a fully worked example.
For a mid-sized warehouse, a payback period of under a year is a realistic scenario provided the calculation covers all cost and gain line items.
Choose between a global rollout and a phased approach
Two strategies are available.
A global rollout covers all zones in a single operation : it maximises gains from day one but mobilises more resources and carries more risk if something goes wrong.
A phased approach (pilot zone first, then extension) allows the solution to be validated in real conditions before committing to the full scope.
For most mid-to-large projects, the phased approach is recommended.
Step 3 : Prepare the field deployment
Map zones and plan the installation
Once the business case is approved, the field work begins. This means precisely mapping each deployment zone: number of locations, racking type, access constraints, network coverage plan.
On a wireless solution, this stage is considerably lighter than you might expect : there's no cabling plan to draw up and no site works to coordinate.
Indicators attach directly to racking with no electrical work required.
Prepare the WMS integration
The integration between pick-to-light indicators and the existing WMS is often the most critical checkpoint in a project.
Protocol compatibility needs to be verified (REST API, MQTT, proprietary interfaces) and the exact data flows defined : what needs to come back, and at what frequency.
For environments with complex legacy systems, our article Integrating IoT sensors into a legacy system covers the most common mistakes and how to avoid them.
Train teams before go-live
The technology only delivers its gains if operators genuinely adopt it.
Training should not be treated as an end-of-project formality : it needs to be planned upfront, built into the deployment schedule and tailored to the profiles of field teams.
A well-structured half-day session is generally enough for operators to be fully autonomous from day one.
Step 4 : Deploy without disrupting operations
Schedule interventions at the right times
In an active warehouse or on a running production line, deployment must be organised to minimise disruption.
This means planning interventions outside peak activity hours, building in buffer zones during the transition, and testing each indicator before it goes live.
On a wireless solution, this phase is considerably simplified : the absence of cabling removes the constraints associated with electrical work and allows installation by successive zones, without immobilizing the entire warehouse.
For large-scale deployments, our IoT deployment service can manage the entire operation : installation, configuration and team training.
Test before going live
Before the official go-live, every indicator must be tested in real conditions : signal responsiveness, LED readability under the zone's actual lighting conditions, network communication stability.
This acceptance test is not a formality : it's what ensures the first production day runs without a hitch.
Step 5 : Measure results and adjust
Compare before and after indicators
The ROI of a pick-to-light project isn't visible the day after deployment.
It's measured over a representative period (typically 4 to 8 weeks after go-live) by comparing the indicators defined during the framing phase with the observed results : picking time, error rate, lines processed per hour.
Make use of embedded analytical data
Modern pick-to-light solutions don't just guide operators, they generate data.
Activation counts, timestamped logs, picking ratios by zone or by operator : these indicators make it possible to identify underperforming zones, detect bottlenecks and progressively optimise the layout.
This is a value-add that's often underexploited in first-generation projects.
Plan the progressive extension
If the pilot phase or first deployment delivers the expected results, extending to other zones becomes a natural next step.
On a wireless solution, this extension requires neither site works nor infrastructure reconfiguration : new indicators simply join the existing network and are configured remotely.
This is one of the structural advantages of wireless over the long term.
Looking to deploy a pick-to-light project ?
Ineo-Sense is a partner that masters the entire lifecycle, from design to field deployment.
Discover our wireless Pick-to-Light and Put-to-Light solutions and tell us about your project.